Pins, Sleeves, and Holy Holes: Building Your First Ita-Bag Without Breaking the Bank
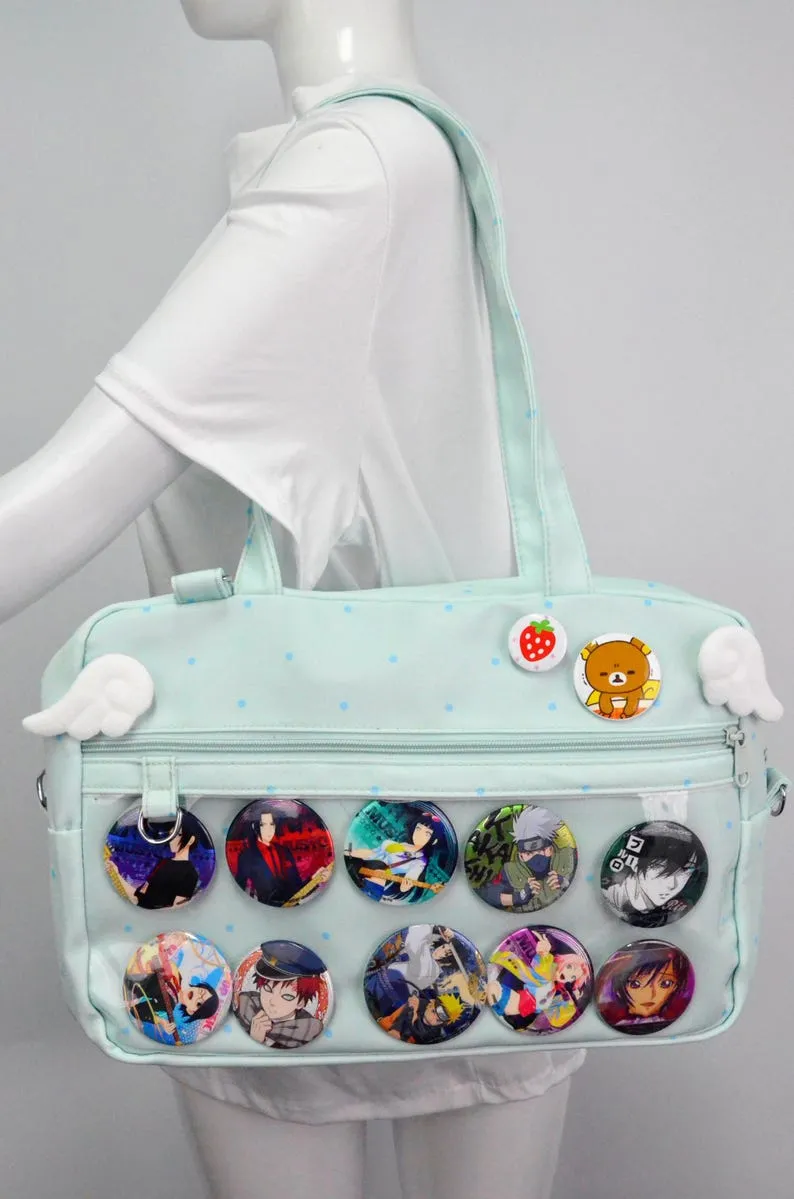
Photo: anime ita-bag decorated with pins and badges, via i.etsystatic.com
So you've seen them at a con: a backpack absolutely covered in badges, acrylic pins, and a figure of someone's favorite character lovingly positioned behind clear plastic. That's an ita-bag — literally "painful bag," painful either because of how much it cost or how hard it goes. Both definitions are correct.
If you've been thinking about building one, good news: it's one of the most fun, most personal projects in all of collecting, and you can start smaller than you think.
What Actually Makes a Bag an Ita-Bag
An ita-bag isn't just a lanyard situation. The defining feature is a dedicated display window — usually a clear protective panel over a section of the bag — where you arrange your merch like a tiny museum exhibit. The rest of the bag might be covered in pins, patches, and ribbons, or kept clean to let the centerpiece shine.
There are two main schools of thought. The "full coverage" crowd covers every square inch, no mercy. The "window" style keeps one pristine display area and treats everything else as supporting cast. Neither is wrong. Pick a lane and commit.
Your Starter Kit: The $50 Route
You do not need to drop serious money to make something you'll be proud of. A realistic beginner setup:
- Base bag with clear window: $20–30. Tons of options on Amazon or at con vendor halls.
- Badge pack or blind pins: $10–15. Start with characters you actually love, not whatever's cheapest.
- Double-sided tape or badge pins: $5.
That's it. Fifty dollars gets you a legit ita-bag. It won't stop traffic, but it'll start conversations — and honestly, that's the whole point.
The Mid-Tier Build: $150–300
This is where most serious hobbyists land. You're upgrading the base bag to a dedicated ita-bag with a firmer insert board, adding acrylic pins and keychains from official merch lines, maybe a small nendoroid peeking out of a side pocket. Protectors matter here — a scratchy window ruins the whole look, so invest in a proper clear panel or replacement sleeve.
This is also when layout becomes a real skill. Fans spend hours arranging pins by color, character, or release date. Some even sketch their layouts first. No judgment. It's art.
The Dream Build: $1,000 and Beyond
Yes, people spend four figures on these. Limited-edition badges, rare event exclusives, a scale figure as the centerpiece, custom lighting in some truly unhinged cases — the ceiling is whatever your wallet says. If you go this route, insurance on the bag is a real conversation, and so is a bag within a bag for travel.
Showing It Off: Conventions Are the Runway
An ita-bag is meant to be seen, and US conventions deliver. Anime Expo, Otakon, MomoCon, and countless smaller shows have become ita-bag showcases, with fans photographing each other's builds and trading merch on the spot. Some communities run ita-bag contests with actual prizes. If you've been collecting quietly, this is your moment to go loud.
One Last Thing Before You Start
The best ita-bags aren't the most expensive ones — they're the ones that clearly belong to someone who loves what's on them. Build slowly, buy what makes you happy, and don't stress about matching anyone else's setup.
Your favorite character deserves a good home. Might as well be one you carry everywhere.